Pace Scheduler contains the software to enable barcode scanning to check in and check out assets. Our barcode scanning functionality works with any existing barcode scanners that you may have. We do not manufacture or sell any physical scanning devices or printers, but have instead built our system so that it works with any standard U.S. barcode scanners and most label printers.
Initial Setup
Create barcodes for items that do not yet have barcodes
- Go to the “Asset Barcodes” page
- Check the box in the left hand column next to any items where you would like to generate a barcode, or click the top checkbox to check all at once. Be sure to do this for all Users in the system as well so you have barcodes for each person. This is useful for checking in and checking out assets.
- Click on “Auto-Generate Checked” to create the barcodes:

Enter barcodes in for items that already have barcodes
- Go to the “Asset Barcodes” page
- For every item that already has a barcode label, click on the Edit icon that looks like a pencil in the Barcode column
- With your barcode scanner attached to your computer, scan the item’s barcode. Notice the barcode numbers now show up in this field
- Click the blue Save button to save this:

Printing barcode labels
- Go to the “Asset Barcodes” page
- Check the box in the left hand column next to any items where you wish to print barcodes
- Click the “Print Selected Barcodes” button. This will open a PDF with the barcodes in the appropriate size. You can then print this using your label printer.

Daily Usage
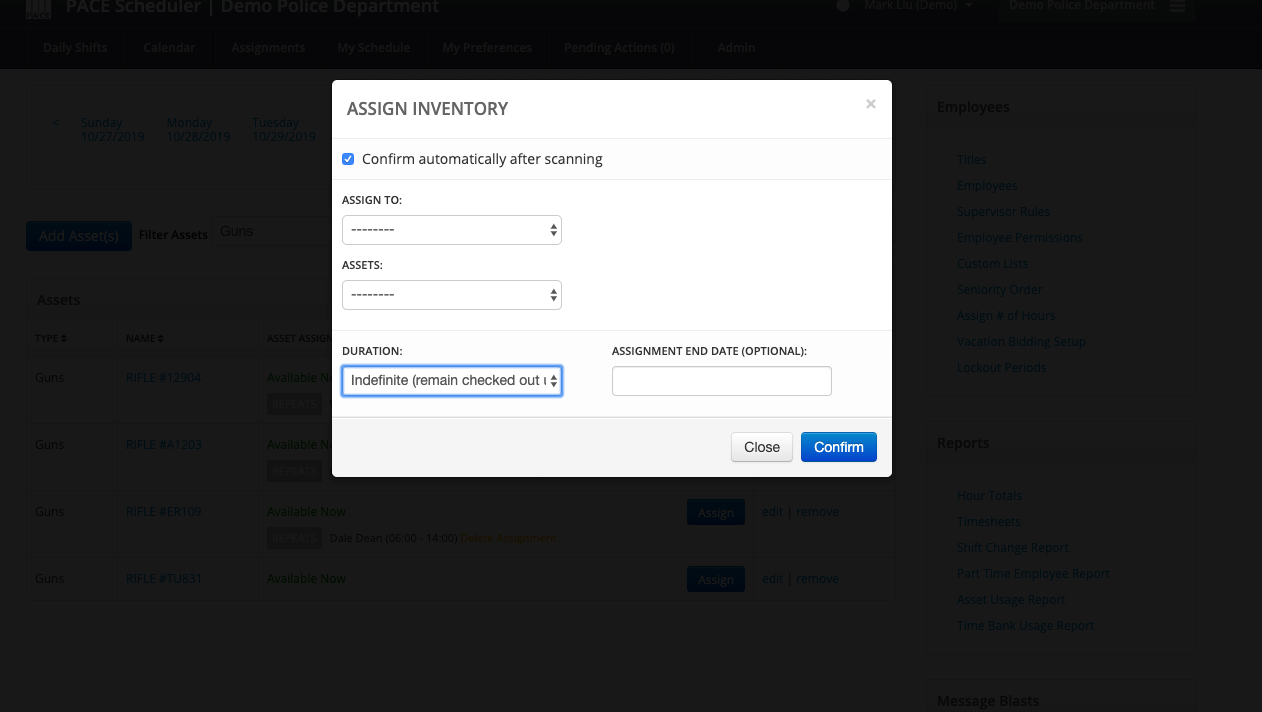
Checking out items
- Pull up your Beat Assignments page. Notice that the person barcodes now all show up here: https://cl.ly/375ce652620f. Alternately, if you are using the barcodes on an employee’s ID you could use that as well and skip this step.
- Go to the “Manage Inventory” page
- Click on the “Assign” button
- For every asset you need to check out, do the following:
- Scan the Employee’s Barcode.
- Scan the Asset’s Barcode
- Notice that this assignment then saves automatically without requiring any further clicks. The Assign page will remain open so you can continue checking out as many items as you wish without having to use your mouse at all.
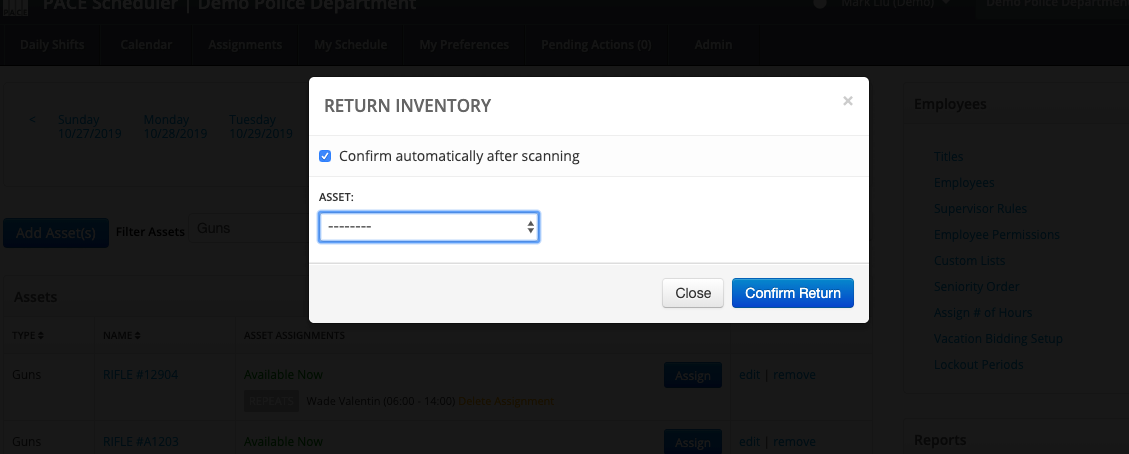
Checking in items
- Go to the “Manage Inventory” page
- Click on the “Return” button
- Scan the Asset’s Barcode. The system then saves this automatically without requiring any further clicks. The Return page will remain open so you can continue checking out as many items as you wish without having to use your mouse at all.